12 September, 2014

AREA RUGS

Anyone want to give me your opinion on an area rug?

I used to have a steal of a sea grass rug that I paid $130 for, it was normally $600. I LOVED it, the texture, the color, how casual it was, how much I didn't care if it got a little damaged because it was so cheap! But man it itched. The little fibers break off and stick through your clothes and stab you. And with little kids and the amount of time we spend on the floor it had to go. I was seriously bummed. I still have it. It's rolled up in the basement, waiting for another day.


So after a year of my old 5x8 rug, it's time for a new one, if I can swallow the price tag of 8x10. Pottery Barn and West Elm are having a pretty good sale right now, but it's still hard to pay that much for a rug and worry that I might hate it. I also want something soft for the kids to play on. I really like the flat weave rugs the best, but they don't feel as nice, so I'm willing to give it up. What don't mother's do for their children? Sheesh!

So, here is our unedited living room without the tree. Blue/green and white walls, orange couch old rug, etc.


Here is one rug I really like. I worry because it's blue. Is a blue rug and blue walls and blue pillows  and blue lamp etc. too much of a good thing? Also, is the rug too formal? I like that pattern and like that it could hide stains, but maybe it's too serious. But also, maybe a little serious is okay.


Here is another from Pottery Barn.


A similar one from West Elm, super shaggy.


The bottom cream rugs I love too, a lovely soft Scandinavian feel. One will most likely end up in our cabin. (Another blog post.) I picked these because I think they might be similar to the sea grass rug as far as a monochromatic, lighter color. However, is cream wool a really bad idea with kids? I don't super freak out about stains, unless they happen in the first week of ownership. We don't live in a model home here, I mean, this was the living room before I took the photo today...


Honestly, this is our room on a regular basis because my kids, okay Casey, can't stop himself from ransacking the pillows and couch cushions. For example, on another day...


At least he is having fun. We also eat snacks in there, but I'm thinking of ending that practice. I actually try to end that practice every 3 months, but I haven't succeeded yet. Eating on a couch is very comfortable. It must be a holdover from being single so long.

So, this really short blog post has gotten enormous. Does anyone have any wisdom to share on this matter?

03 April, 2014

WINTER SURPLUS

I wanted to make Casey a new quilt to cuddle under when he sat on the couch or read a book. Currently this blanket is being used for forts and not laps. At least it's being used! I like the quilts I make to have a purpose and be used because really, one day they'll probably be out of style and ugly,
and you will look at it wondering what you were thinking choosing those hideous fabrics from the 80's. Oh the 80's.


I really wanted to try marrying easy patchwork with a giant monogram appliqué this time around. I went through so many sketches that ended up ugly by the time I got them in the computer that I completely revamped my ideas and decided to marry the patchwork with my love of wool army surplus blankets. (Aren't the muted blues of these homespun fabrics beautiful?)


The patchwork I had in mind was much simpler, but of course as I was browsing around I really fell in love with the broken dishes pattern I was seeing. Why do I do this to myself? It's not that it is more difficult, but the smaller squares take so much more time. I have half a quilt of small squares sitting in my closet that I started in 2001. I'll never finish it.


I did figure that bold stripes, found in a lot of wool army blankets, might go well with the smaller squares.


I still wanted to do a monogram, but did away with the giant one and went for small. And really, what army surplus blanket wouldn't need a monogram? I also love the wool Hudson Bay Point blanket and noticed they have small stripes on the side which apparently were there to tell you the size and weight of the blanket without unfolding it. I totally had to incorporate that idea too.


It feels like it has been a long winter here and I feel the blues in the quilt reflect a winter scene so I named the quilt Winter Surplus. But when you have a 3 year old and you long for summer, you absolutely need to put a happy color on the back of your quilt.


Of course I couldn't forget the Swiss Army blanket for Casey. I didn't put this in the pattern but made it just for him. I sewed the cross from leftover pieces of fabric I had and it's very wonky. A lot of people wouldn't like the wonky nature of the seams, but for some reason I do.


And now our little girl needs one. Mostly because I love her, but also because I know if I don't make one for her now, we will be in therapy with her when she is a teenager, all because I never made her a quilt when she was baby!

You can order the pattern at Craftsy.

19 March, 2014

PHOTO SHOOTS WITH A THREE YEAR OLD

Look a little like this,


Some baby sisters get strangled and you have to set the camera down so you can rescue her.


Some shots don't work for the product, but the look on your three year olds face perfectly displays the joys of being three.


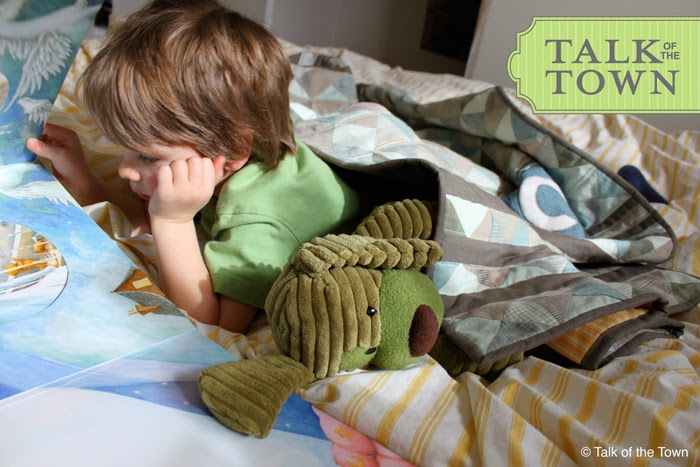
Sometimes the stuffed dog appears as soon as you snap the shot.


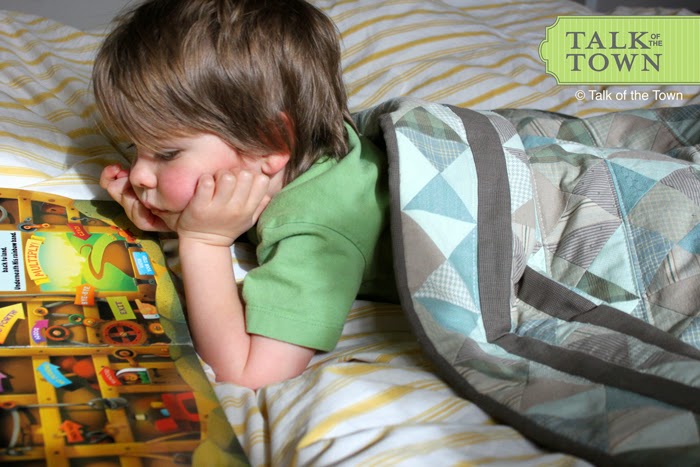
Sometimes the camera catches how you see them. A little boy.


Absorbed in his book.


Sometimes the camera makes them look older than three and you want to reach out and kiss and snuggle them because you can't believe how fast they are growing up.


06 December, 2013

NEW QUILT FOR YUKON


Three more weeks 'til Christmas.  I think piecing a quilt is harder than appliqué!

17 November, 2013

PEG + CAT


Casey has a new favourite television show and I love it too. The art is fantastic, which is probably why I like it the most, but it's nice for Casey to have fun with math too. The cat cracks me up and the songs are fun. I hope to see more kids shows like this. It really makes me wish I was more driven to illustrate.


29 June, 2013

CRAFTSY

A couple months ago I found a new site called Craftsy and signed up, placed my patterns and started browsing. I can't tell you how good it's been to me. My quilt patterns have sold very well and I love that it is geared to creative people with classes, patterns and ideas. While Etsy has been good to me over the years, Craftsy is much more targeted to the creative person, and love that.


11 April, 2013

DIRECTIONS


The directions are done and that is crazy fast for me. I plan on putting in sizes for full, queen, and so and and so forth, but those will have to come later because I need to figure it out. I felt I should post my inspiration though, just in case Ann Sacks feels the need to storm up to Canada and give me a cease and desist order, because I like to know I have been up front about how much I love her stuff.  Do you hear that Ann? I LOVE your stuff.


This tile, Beau Monde Glass, Blossom, Aquamarine, is so very beautiful and I've had it in my head for over a year, maybe two? now. I certainly never planned on my quilt looking so similar to the tile, but apparently it stuck in my head a little too strongly. Even the fabric is similar to the tile color and that was a complete accident as I generally just go into the store and pick willy-nilly.


I think the tile has a lot more browns in it than the one square tile shows, which I don't love, but still, so amazing. I would absolutely love it in white.

Confession over.

27 March, 2013

NEW BABY

This morning a new baby boy has joined my brother and sister-in-laws family. It's always so exciting to have new babies and to give them new things. So this new baby boy is getting my newly finished quilt.


I've decided to call it Sea Glass, because those colored fabrics remind me of of the green glass buoys everyone but me seems to have. And I want some! This time I machine appliqued with a blanket stitch instead of needle turn. I think I prefer the look of needle turn, but you can't ignore the speed of machine applique and the contrasting thread makes it interesting.


I then decided to hand quilt everything else to make the quilt soft to wrap a new baby in. I love the ornate machine quilts, but there is something very... down to earth I guess about hand quilting. I hand quilted around each petal in grey to give some emphasis with the stitching. I love how the dotted line turned out, then used white for a more subtle approach for the background.


So there you go, the newest project, Sea Glass, going to our new family member. We love him already.


The pattern should take less than a year this time!


21 March, 2013

HOW TO BUILD A RANGE HOOD INSTRUCTIONS


I have had a few people asking how I built this range hood so I thought I would do a small post about it. I would like to say, that these instructions are pretty lame and broad. It's hard to go back and remember how I did stuff when I wasn't really documenting, for instructions, I was just winging it. But some smart person may be able to decipher what I did and build their own, even better hood.

The widest part of the hood is almost 37 inches. That is the trim at the bottom of the upper curve. Our ceilings are 8 feet which made the length of the hood from the ceiling, not including the descending curves 29 1.2 inches. It is 31 inches to the stove, but the fan inside has more distance. All of these measurements were important to me in making sure the hood didn't look out of proportion.

When I designed the hood, I designed it all in the design program Illustrator. I am a graphic designer so it was easy to use the tools available to me to make the curves I like etc. Then I printed it all out full scale and hung it on my walls. This was the side profile I had printed out. Then I had my tall husband stand around it so I could get the height of the hood right and adjusted where needed. This could also be done just by sketching your shape on newsprint and hanging it on your wall.

My husband built a 2x4 frame and securely mounted it to the wall, and we mounted the fan to the frame. Then I cut all the exterior shapes out of 1 inch thick MDF and screwed it to the frame. The sides went on first then the curved front. I used 1/4 inch MDF so it would be flexible and bend to the curve. My husband and I had to push very hard on the MDF to join it with the curve and we used staples to secure it. The straps were also from the 1/4 inch MDF. Then I trimmed out the front and top in MDF as well and gave it a good sanding to make it nice and smooth.

Underneath there painted plywood, cut the  dimensions of the box with a hole cut out of the center for the fan. The bottom of the fan that has the switches and light covers then attaches over the plywood to the fan up in the hood. One day I'll cover this in stainless steel.

The scallops were from a scrapbooking store and were 4 inch die-cut this paper circles I cut in half and glued under my trim. I had bought a hole saw bit to make the circles, but that was a bit of a comical disaster. These paper ones worked like a charm and when painted are as solid as the MDF.

I wish I had taken picture of each step, because I can't remember what the frame looked like underneath, but I know I was able to staple some of that curved front to it. I think there was a cross bar or something. The next range hood I build will not have the curved front. While I love the look, it was hard to pull off with my limited skills. Luckily we were successful and it looks kind of okay!

19 November, 2012

NEW NEW NEW

New fabric...


New sewing machine...


New quilt design. I wish I was a better sewer.

06 October, 2012

SLIPCOVERS


I found this chair on Kijiji for $25. I love a rolled arm and most rolled arm chairs I look at are over $800. I practically fell all over myself trying to call the woman selling it before someone else got it. Now, this chair probably wasn't that much, it seems a bit cheap in some ways, but still, comfy, nice shape, great to lounge in front of a window with.

Ha! I just looked at the above picture. What a MESS! It is my only before picture and I still don't have Photoshop loaded on my computer.

Anyway, the plaid fabric is definitely "cabinish" and not too horrible, but I wasn't looking to be too stereotypical here. So I decided to slipcover it.


The back cushion was extremely misshapen and uncomfortable, so I replaced it with a cushion from Ikea. Pretty good size. I did cover it with batting to make it a little bigger. I also had to shorten the seat cushion. It was weird how long it was and it also left these big gaps in front of the arms. You can kind of tell in the first picture.


It's amazing how comfortable and cheap canvas drop cloth can be. This chair gets sat in the most.


I tied the backs with some ribbon I saved on a wedding gift from a good friend. She knew I coveted that ribbon. At least I think she knew. It adds a little bit of flair to a spot nobody sees.


So there you have it, a comfy chair for at the most $50.I wish I had two.


Instead I have two of these which need to be recovered. I'll probably just slipcover them as well. Easy to keep clean that way.

01 October, 2012

RECOVERING A CHESTERFIELD

Sometimes you have to say a word from your youth so you don't forget. We always called our couch the chesterfield. I miss calling it that. But I think movies and television shows homogenize the English language a bit so words get lost in the past.


So, this is the story about a chesterfield I found at Catholic Charities for $45. SOLD. I brought it home and began my first re upholstery job. It was awesome to take something apart and figure out how it goes back together again. (I don't know why my text goes to single spacing after I start putting in photos now.)


I would do some things differently if I were to do it again, of course. I wanted to cover it in denim or a canvas fabric, but I got wooed by a some medium weight fabric in the bargain bin that was $3.99. It was polyester, but looked okay and I figured polyester would be easy to keep clean.

Nope, DON'T BE LIKE ME! Get the heavy weight fabric. While the couch looks okay, you can see the little bumps of the cotton batting underneath. I think if you want to use thinner fabric you need to upholster it on two layers to smooth everything out. And it doesn't clean that well. Oh well. Live and learn.


I didn't like how the front of the arms were so I changed them to be more smooth and tucked. And I also removed the skirt to leave the legs showing. Still need to upholster the underside


I also am really liking the one long cushion lately, but I didn't want the expense of having a new foam cushion cut. Foam is pricey. So, I took apart the three cushions cut the sides so they were squared up more. put extra stuffing where the cushions dipped at the seams. covered them all in cotton batting and then slip covered it. I like the wonky, uneven piping. Weird I know, but it makes it seem softer and lived in to me.


The most fun was the tufting. While I really love diamond tufting, this sofa didn't come that way and I decided I didn't need the extra challenge.

So there you go, A new sofa with the total cost of around $175. Not including the upholstery gun I bought. You really need one and I didn't end up getting it until I was 3/4 of the way done.


Sorry for the terrible, unedited photos. All from my phone because my hard drive died taking all of my photos with it. And for a paltry $2000 I can attempt to recover them. My computer is still somewhat out of commission as well, I haven't loaded any of my software on the new hard drive because I have no idea what box it is in. I hope I have it.